
A bit over a year ago we decided that, having far too much
free time and excess funds, it was time we bought a house to relieve us of
both. Having been cooped in an apartment for the better part of a decade, we
had a dearth of furniture[i].
When we moved into our relatively larger new space I decided I needed an equally
new desk[ii].
As
I’ve written about previously, the idea of a DIY wood desk was sparked by
seeking something I liked in the store and thinking those four damnable words “I
could build that!”
I spent some time figuring out what I wanted and and how to
build it. I acquired tools…manly tools. Tools brimming with the shiny electric
promise of power, craftsmanship, and potential accidental dismemberment. I perused lumber stores, read up on finishes,
made 3d computer models, and started work on my trestle desk[iii].
And then changed my mind. A lot. I ended up ditching the
trestle style for a passing infatuation with a “campaign” style desk I saw on a
website. Many a tree was sacrificed to my mental vacillation. Hunks of mangled
wood built up in the corners of my miniscule shop like misshapen children,
mocking me with their little streaky, warped faces. I learned almost entirely
by trial and error which is evident by the mixture of sawdust, blood, and tears
that carpets every surface in our garage.
Something went awry.
The final steps in the process were to assemble and finish
the base, build and finish a new top out of pine and poplar edging, build
drawers and install them, and finish the base in lacquer (shown below). So
essentially, everything but cut the wood. The addition of a pocket hole jig and
new drill helped a lot.
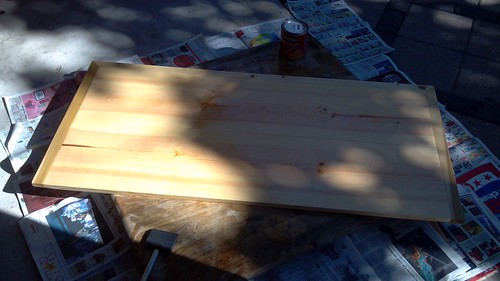
Constructing and finishing a new top.
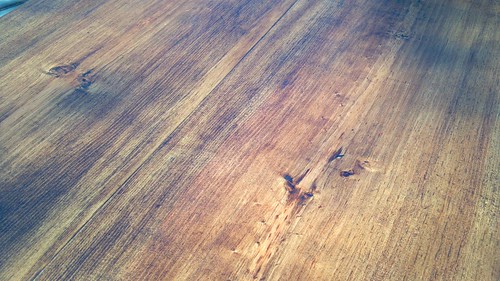
Finished top grain. A little streaky, by weathered look works for
campaign style.
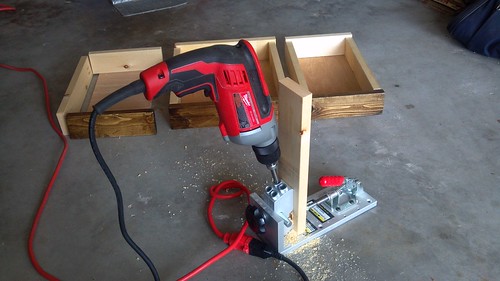
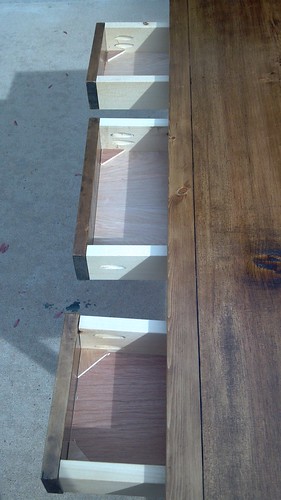
Drilling pocket holes.
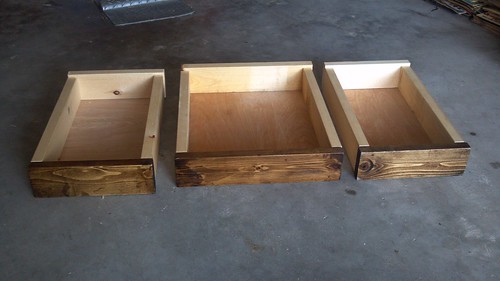
Building and staining drawers.
Finished drawers in place.
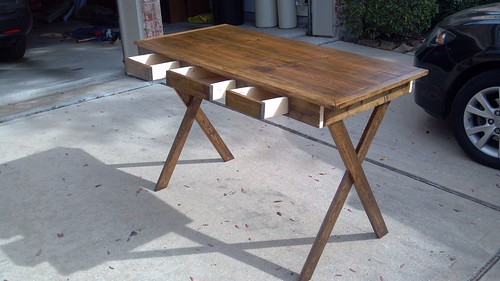
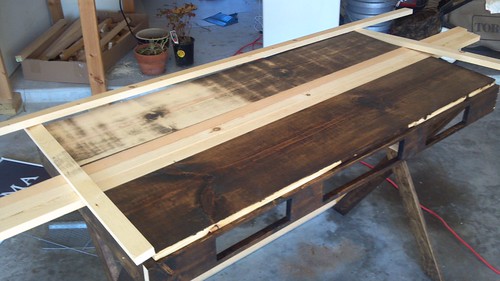
Desk before final staining, lacquer application and hardware.
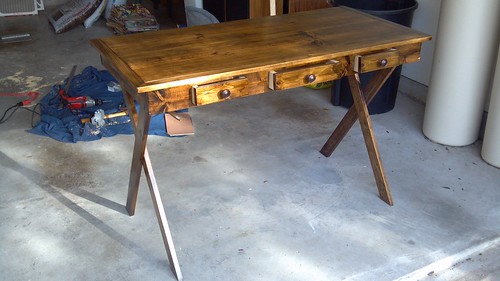
Hardware attached, drawers partially open (they fit flush). Spreader on
bottom still needs to be put in place.
Here at the tail end of the journey, I now have a
functioning desk. Not perfect, not without flaw, but functioning. The one
upside of going with a historical “campaign” style is that any flaw can be
simply written off as “historic”. Issues with the finish? Historic! Slightly
wobbly? Historic! Potentially cursed as a result of desperate pacts made with
dark entities in some of my more desperate moments? Historic!
Notes:
[i] In
conversations with friends, no one would buy that it was simply “minimalist”
aesthetic, or at least not deliberately so.
[ii]
My previous desk was also a DIY special, but one made without the benefit of
such niceties as appropriate tools, plans, or common sense. More than one
woodworker hissed and recoiled like a vampire from holy water when they saw it.
[iii]
I even put aside my ongoing blood fued with math long enough to figure out the angles
and dimensions and such. Don’t get complacent, math. I still hate you. Just
saying.
2 comments:
This is beautiful.
I have to ask how your draws are kept from falling in? Did you use slides or just a 'chute'?
Ben
Post a Comment